MongoDB
MongoDB on dokumenttitietokanta ja NoSQL-tietokanta. NoSQL-tietokantaan tallennetaan tietoa toisella tapaa kuin relaatiotietokantaan. NoSQL-tietokanta on tullut vaihtoehdoksi perinteiselle relaatiotietokannalle tallennuskapasiteetin ja tietokoneiden tehokkuuden kasvettua vuosien saatossa. NoSQL-tietokantaa ei käytetä SQL-kyselyiden kautta vaan sinne lisätään ja poistetaan uusia dokumentteja. Tässä demossa käytetään lähteenä Helsingin yliopiston Fullstack-kurssin osiota Tietojen tallentaminen MongoDB-tietokantaan.
Huom: mikäli koululta ei saada yhteyttä toimimaan voidaan MongoDB tehdä Dockerin avulla.
- Mongodb ja mongo-express (localhost) (otredu)
Yhdistäminen
Tee uusi kansio notesmongodemo. Tee tämän alle kansio notesmongoback. Alustetaan npm. Käytetään yhteyteen Mongoose-kirjastoa. Asenna se:
npm init
npm install
npm install mongoose
Tehdään ensin testitiedosto jolla kokeillaan miten lisätään uusi dokumentti/tietue.
Notes-testi
Tee uusi tiedosto mongo.js ja testataan sen avulla yhteyttä Mongo-tietokantaan.
Otetaan käyttöön mongoose-kirjasto ja yhdistetään config-tiedoston avulla tietokantaan.
const mongoose = require('mongoose')
const dbConfig = require('./config');

 mongoose.Promise = global.Promise;

 mongoose.connect(dbConfig.url, {
     useNewUrlParser: true,
     user: dbConfig.user,
     pass: dbConfig.pwd,
     authSource: "admin"
 }).then(() => {
     console.log('successfully connected to the database');
 }).catch(err => {
     console.log('error connecting to the database', err);
     process.exit();
 });
Kun yhteys on tehty laaditaan skeema ja model. Lisätietoa mongoosejs-sivustolla (skeemasta ja modelista).
const noteSchema = new mongoose.Schema({
    content: String,
    date: Date,
    important: Boolean,
})

const Note = mongoose.model('Note', noteSchema)
Lopulta esitellään uusi note ja tallennetaan se:
const note = new Note({
    content: 'HTML is Easy',
    date: new Date(),
    important: true,
})

note.save().then(result => {
    console.log('note saved!')
    mongoose.connection.close()
})
Suorita ohjelma
node mongo.js
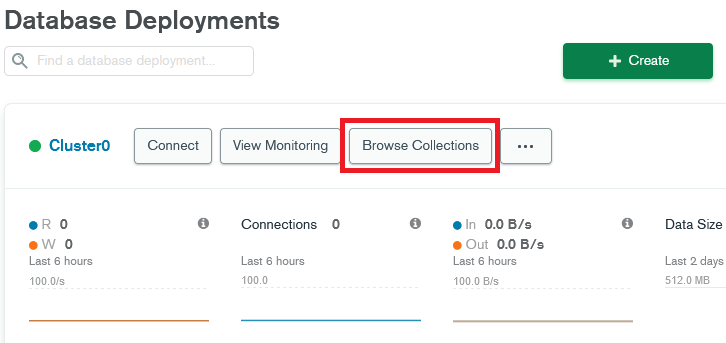
Katsotaan tietokannan sisältämää tietoa Browse Collections-kohdassa:
Kokeillaan antaa tietokannalle toinen nimi. Poista myFirstDatabase ja muuta tietokannan nimeksi koodissasi noteApp. Aja sovellus uudelleen ja tarkista tiedot.
Kokeile lisätä tietokantaasi muutamia viestejä. Tämän jälkeen kommentoi kohta notesin lisäämisestä ja kokeillaan hakea tiedot tietokannastasi:
Note.find({}).then(result => {
    result.forEach(note => {
        console.log(note)
    })
    mongoose.connection.close()
})
Hakuehto tulee find-metodin sisälle, jos halutaan hakea vain tärkeät viestit:
Note.find({ important: true }).then(result => {
    ...
})
Lisätietoa hakuoperaattoreista löytyy MongoDB:n sivuilla.
Backend (index.js)
Laaditaan backend joka ottaa yhteyden Mongo-tietokantaan.
index.js
Lisää .env-tiedosto ja sinne
PORT = 3001
DB_HOST = mongodb://localhost:27017/
DB_USER = root
DB_PASS = mypass123
DB_DATABASE = demo
Asenna dotenv, express, bcryptjs, jsonwebtoken ja nodemon:
npm install dotenv
npm install express --save
npm install bcryptjs --save
npm install jsonwebtoken --save
npm install --save-dev nodemon
npm install mongoose
Lisää package.json -tiedostoon start-skripti, käynnistä backend npm start.
"start": "npx nodemon index.js"
Tee config.js -tiedosto
require('dotenv').config()

let PORT = process.env.PORT

let DATABASE_OPTIONS = {
    host: process.env.DB_HOST,
    user: process.env.DB_USER,
    password: process.env.DB_PASS,
    database: process.env.DB_DATABASE,
}

let URL = process.env.DB_HOST + process.env.DB_DATABASE
let SECRET = "tosisalainensalasanainen"

module.exports = {
    DATABASE_OPTIONS,
    PORT,
    URL,
    SECRET
}
index.js-tiedostossa ota mukaan .env ja express
require('dotenv').config();
const bcrypt = require('bcryptjs')
const jwt = require('jsonwebtoken')

const dbConfig = require('./config');
const PORT = dbConfig.PORT;

// const Note = require('./models/note')
// const User = require('./models/user')
const express = require('express')
const app = express()
app.use(express.json());
Kuunnellaan porttia
app.listen(PORT, () => {
    console.log(`Server running on port ${PORT}`)
})

app.get('/', (req, res) => {
    res.send('<h1>Hello World!</h1>')
})
note.js
Erotetaan models / note.js -tiedostoon mongoDB:n käsittely.
const dbConfig = require('../config');
const mongoose = require('mongoose');

mongoose.connect(dbConfig.URL, {
    useNewUrlParser: true,
    user: dbConfig.DATABASE_OPTIONS.user,
    pass: dbConfig.DATABASE_OPTIONS.password,
    authSource: "admin"
}).then(() => {
    console.log('successfully connected to the database');
}).catch(err => {
    console.log(dbConfig.URL)
    console.log('error connecting to the database', err.message);
    process.exit();
});

const noteSchema = new mongoose.Schema({
    content: String,
    date: Date,
    user_id: String,
    important: Boolean,
})

noteSchema.set('toJSON', {
    transform: (document, returnedObject) => {
    returnedObject.id = returnedObject._id.toString()
    delete returnedObject._id
    delete returnedObject.__v
    }
})

module.exports = mongoose.model('Note', noteSchema)
note.js exporttaa Note:n jota voidaan käyttää index.js-tiedostossa.
index.js
Otetaan Note käyttöön index.js-tiedoston alussa.
const Note = require('./models/note')
Tässä käytössä jo käyttäjän kirjautuminen ja rekisteröityminen. Tähän tarvitaan apufunktiota getTokenFrom:
const getTokenFrom = req => {
    const authorization = req.get('authorization');
    console.log("authorization", authorization);
    if(authorization && authorization.toLowerCase().startsWith('bearer ')){
        return authorization.substring(7)
    } else {
        return null
    }
}
Haetaan notesit tietokannasta:
app.get('/api/notes', (req, res) => {
    const token = getTokenFrom(req);
    console.log(token);

    if(!token){
        return res.status(401).json(
            { error: "auth token missing" }
        )
    }

    let decodedToken = null;

    try{
        decodedToken = jwt.verify(token, dbConfig.SECRET);
    }
    catch(error){
        console.log("jwt error")
    }

    if(!decodedToken || !decodedToken.id){
        return res.status(401).json(
            { error: "invalid token" }
        )
    }


    Note.find({user_id: decodedToken.id}).then(notes => {
        res.json(notes)
    })
})
Muut backendin toiminnot
index.js
Muistiinpanon lisääminen
app.post('/api/notes', (req, res) => {
    const token = getTokenFrom(req);
    console.log(token);

    if(!token){
        return res.status(401).json(
            { error: "auth token missing" }
        )
    }

    let decodedToken = null;

    try{
        decodedToken = jwt.verify(token, dbConfig.SECRET);
    }
    catch(error){
        console.log("jwt error")
    }

    if(!decodedToken || !decodedToken.id){
        return res.status(401).json(
            { error: "invalid token" }
        )
    }

    const body = req.body

    if (body.content === undefined) {
        return res.status(400).json({ error: 'content missing' })
    }

    const note = new Note({
        content: body.content,
        user_id: decodedToken.id,
        important: body.important || false,
        date: new Date(),
    })

    note.save().then(savedNote => {
        res.json(savedNote)
    })
})
Yhden muistiinpanon avaaminen
app.get('/api/notes/:id', (req, res) => {
    Note.findById(req.params.id).then(note => {
        res.json(note)
    })
})
Muistiinpanon poistaminen onnistuu findByIdAndDelete-metodilla:
app.delete('/api/notes/:id', (req, res, next) => {
    Note.findByIdAndDelete(req.params.id)
        .then(result => {
        res.status(204).end()
    })
    .catch(error => next(error))
})
Muistiinpanon tärkeyden muuttaminen findByIdAndUpdate-metodilla:
app.put('/api/notes/:id', (req, res, next) => {
    const body = req.body

    const note = {
      content: body.content,
      important: body.important,
    }

    Note.findByIdAndUpdate(req.params.id, note, { new: true })
      .then(updatedNote => {
        res.json(updatedNote)
      })
      .catch(error => next(error))
  })
Testaaminen
Tee kansio test ja kokeile .http-tiedostojen avulla kaikkien muistiinpanojen hakemista ja uuden muistiinpanon lisäämistä.
GET http://localhost:3001/api/notes HTTP/1.1
Authorization: bearer eyJhbGciOiJIUzI1NiIsInR5cCI6IkpXVCJ9.eyJ1c2VybmFtZSI6ImVlcmlra2kiLCJpZCI6IjY2MTNjMWIxMjllNzU2MTUxNWI2MGY1NSIsImlhdCI6MTcxMjU3MTA3MX0.3-LYBqE_rCmE9PjvSusd2VNn2BGCwMqt5HzUiq-SoVA
content-type: application/json
Lisääminen:
POST http://localhost:3001/api/notes HTTP/1.1
Authorization: bearer eyJhbGciOiJIUzI1NiIsInR5cCI6IkpXVCJ9.eyJ1c2VybmFtZSI6ImVlcmlra2kiLCJpZCI6IjY2MTNjMWIxMjllNzU2MTUxNWI2MGY1NSIsImlhdCI6MTcxMjU3MTA3MX0.3-LYBqE_rCmE9PjvSusd2VNn2BGCwMqt5HzUiq-SoVA
content-type: application/json

{
    "content": "Testataan MongoDB",
    "date": "2022-01-10T17:30:31.098Z",
    "important": false
}
Kirjautuminen ja rekisteröityminen
user.js
Tehdään models-kansioon käyttäjille oma tiedosto user.js.
const dbConfig = require('../config');
const mongoose = require('mongoose');

mongoose.connect(dbConfig.URL, {
    //useNewUrlParser: true,
    user: dbConfig.DATABASE_OPTIONS.user,
    pass: dbConfig.DATABASE_OPTIONS.password,
    authSource: "admin"
}).then(() => {
    console.log('successfully connected to the database');
}).catch(err => {
    console.log(dbConfig.URL)
    console.log('error connecting to the database', err.message);
    process.exit();
});

const userSchema = new mongoose.Schema({
    username: String,
    password: String,
    email: String
})

userSchema.set('toJSON', {
    transform: (document, returnedObject) => {
    returnedObject.id = returnedObject._id.toString()
    delete returnedObject._id
    delete returnedObject.__v
    }
})

module.exports = mongoose.model('User', userSchema)
index.js
rekisteröityminen
app.post('/api/register', (req, res) => {
    const user = req.body

    if (user.username === undefined || user.email === undefined || user.password === undefined) {
        return res.status(400).json({ error: 'content missing' })
    }

    const saltRounds = 10;
    console.log(user);

    bcrypt.hash(user.password, saltRounds)
        .then((passwordHash) => {

            const newUser = new User({
                username: user.username,
                password: passwordHash,
                email: user.email,
            })

            newUser.save().then(savedUser => {
                res.json(savedUser)
                console.log("register toimii")
            })

        })
})
Tee tests-kansioon testi rekisteröitymisesta, kokeile toimintaa.
kirjautuminen
app.post('/api/login', (req, res) => {
    const body = req.body;
    console.log(body);

    User.find( {username: body.username} ).then(dbuser => {
        console.log(dbuser)

        if (dbuser.length == 0) {
            return res.status(401).json(
                { error: "invalid username or password" }
            )
        }
        const tempUser = dbuser[0];
        bcrypt.compare(body.password, tempUser.password)
            .then((passwordCorrect) => {
                if (!passwordCorrect) {
                    return res.status(401).json(
                        { error: "invalid username or password" }
                    )
                }

                //token
                const userForToken = {
                    username: tempUser.username,
                    id: tempUser.id
                }

                const token = jwt.sign(userForToken, dbConfig.SECRET)

                //console.log(token);

                res.status(200).send({
                    token,
                    username: tempUser.username,
                    role: "regularuser"
                })
            })
    })
    .catch((err) => {
        console.log('login failed')
        res.status(500).json(
            { error: err }
        )
    })

});
Tee tests-kansioon testi rekisteröitymisesta ja kirjautumisesta, kokeile toimintaa.
POST http://localhost:3001/api/register HTTP/1.1
content-type: application/json

{
    "username": "tester1",
    "password": "salasana",
    "email": "tester1@test.com"
}
Frontend
Ei korvata vanhaa notesbackend-versiota vaan tehdään kopio joka käyttää MongoDB:tä. Tee itsellesi uusi kansio notesmongofront ja kopioi sinne notesfront jota käytettiin MySQL-tietokannan kanssa.
- notesService.js: vaihda baseUrl muotoon api/notes
- userService.js: vaihda samaan tapaan login ja register muotoon api/login ja api/register
- Muuta polut vite.config.js-tiedostossa.
- Testaa sovelluksen toimintaa
- kaikkien muistiinpanojen hakeminen
- uuden muistiinpanon lisääminen
- muistiinpanon poistaminen
- muistiinpanon tärkeyden muuttaminen
Harjoitus
Teemme MongoDB:tä käyttävän version keikkainfosta.